How to Set up Bash on Ubuntu on Windows, Zsh, and Hyper Terminal
Have you ever wished that your Windows terminal emulator could look more aesthetically pleasing or be as feature rich as the Linux terminal?
How about both?
In this post, I will discuss how to improve your Windows terminal experience be integrating a set of awesome technologies.
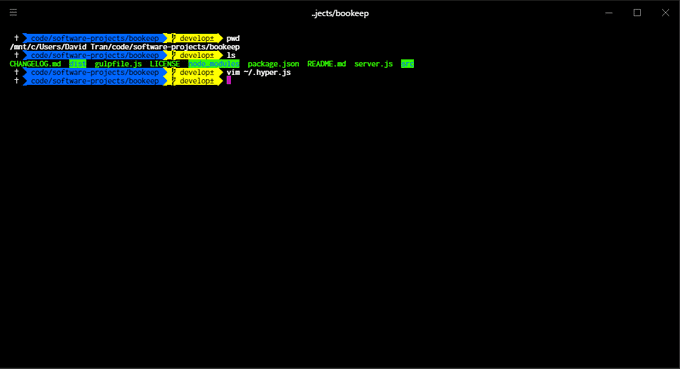
Let’s take a look at the finished product!
Okay, maybe it does not look that great (the prompt styling is a bit off). If you do not like my style, get out of here there are many themes you can choose from. More importantly, this terminal is packed with Linux commands like touch, ssh, rsync, and much more!
How to Install Bash on Ubuntu on Windows
“Bash on Ubuntu on Windows”.
Man, what a mouthful. I suppose it gets the point across at least.
Essentially, we are going to be installing an application that runs the native Bash shell along with the Linux command-line tools from an Ubuntu image.
I just brushed over the complexity of what we are doing but take a moment to realize how amazing this process actually is. You can get a more in-depth explanation of the underlying processes on this page by Jack Hammons.
Enabling Windows Subsystem for Linux (WSL)
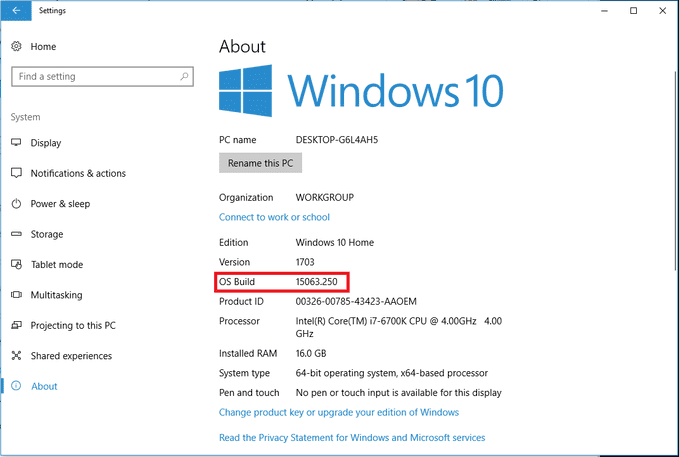
First, make sure you have installed the Windows 10 Anniversary Update (build 14393 or higher).
You can check your system’s build version by going to “Settings” -> “System” -> “About”.
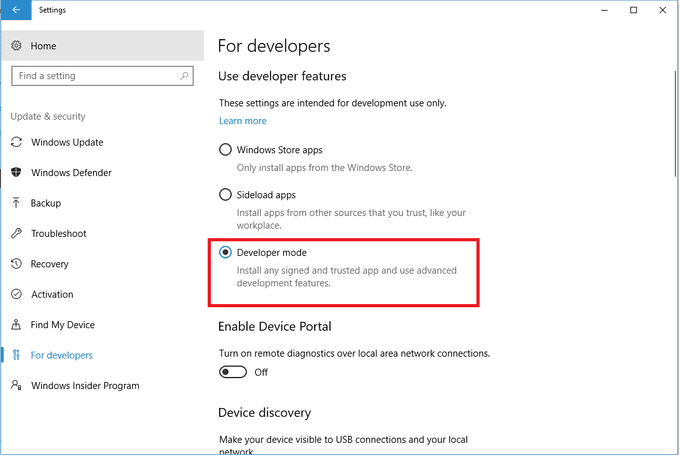
Once this is confirmed, head to “Settings” -> “Update & security” -> “For developers” and enable “Developer mode”.
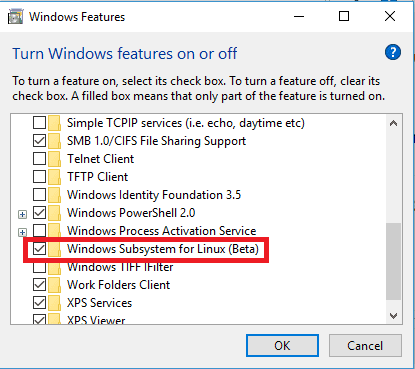
Afterwards, head back to the main Settings page and navigate to “Apps” -> “Programs and Features” (you may need to scroll down for this) -> “Turn Windows features on or off” (on the left).
Find and check “Windows Subsystem for Linux (Beta)”. This will request a reboot that is necessary to install a Linux image on Windows.
Installing Bash on Ubuntu on Windows
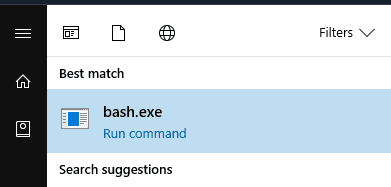
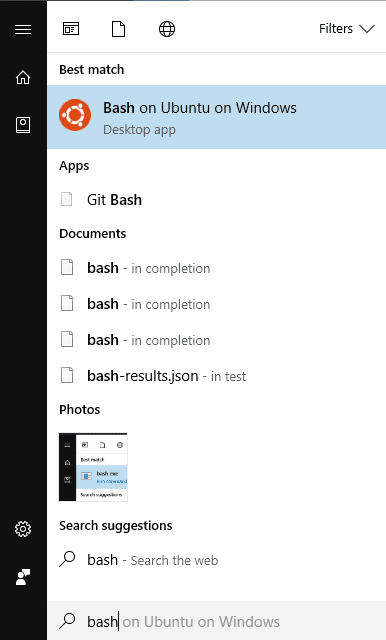
After the reboot, press the Windows key, type “bash”, and press the “Enter” key.
This will run bash.exe and prompt you to accept the terms of service. Once accepted, the “Bash on Ubuntu on Windows” application will be downloaded and installed. After installation, you will be asked to create a user account and password to use with this Bash environment.
Now, you should have the Bash on Ubuntu on Windows application installed!
Like previously mentioned, this application is actually from a Linux instance and you get all the awesome Linux terminal commands. Pretty neat if you ask me!
Also, your local drives are mounted on this Linux image so if you have a C:/ drive, you will need to access it from /mnt/c/.
How to Install Zsh and Oh My Zsh
Zsh (or Z shell) is just another shell for your terminal. There are differences between Bash and Zsh but to be honest, I am not knowledgeable enough to explain the benefits of either. There is a great article that compares the two over at Stack Abuse.
I am choosing to use Zsh simply because the theme I want to use is compatible with it. 🙂
Installing Zsh
First, let’s install Git and cURL as we will be using those later.
sudo apt-get install git curlNow, let’s install Zsh!
sudo apt-get install zshThat was much easier than installing Bash on Ubuntu on Windows, wasn’t it?
Installing Oh My Zsh
Oh my Zsh is a framework for Zsh that helps manage configurations.
To install Oh My Zsh, issue the following command:
sh -c "$(curl -fsSL https://raw.githubusercontent.com/robbyrussell/oh-my-zsh/master/tools/install.sh)"To configure the terminal to default to using Zsh, open the .bashrc file for editing:
vim ~/.bashrcAdd the following to the beginning of the file:
bash -c zshHereafter, Bash on Ubuntu on Windows will default to Zsh (or when you issue the bash command).
How to Install and Configure Hyper Terminal
Hyper is a customizable terminal emulator that is built on web technologies.
Head over to Hyper’s home page and install the application.
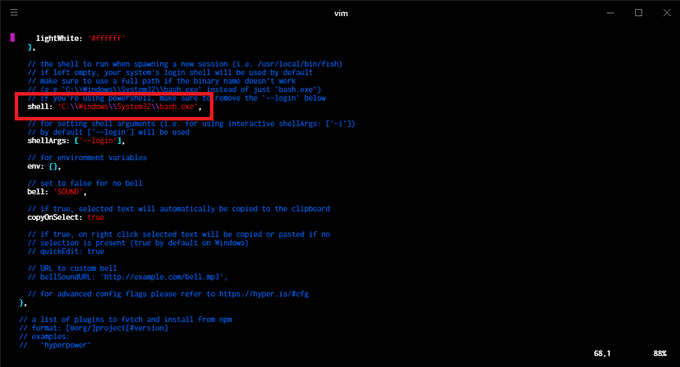
Hyper is awesome in that it can be told to use a specific shell. In this case, we will tell it to use Bash on Ubuntu on Windows (which now uses Zsh).
Edit the Hyper configuration file to point to the location of your Bash executable.
vim .hyper.jsYou now have a hackable terminal emulator that is backed by a feature rich shell!
Personal Configurations
Initially, the home directory (~) of my Hyper terminal pointed to /home/USERNAME/. Personally, I wanted the home directory to be /mnt/c/Users/MY_NAME so I added the following line to .zshrc:
export HOME="/mnt/c/Users/MY_NAME"Recall that your local drives are mounted on the Linux instance so we need to access them via /mnt/.
Prompt Layout
If you like the prompt layout you saw in the first image, here is a guide from Wes Bos on how to install it.
You can also find the matching theme for Hyper here! I elect to use a black background but I think the Cobalt2 theme looks fantastic as well!
Really, I have to thank Wes Bos for making the hours I spend staring at my terminal quite pleasant. To be truthful, this setup motivates me to use my terminal more often!
If you run into trouble when trying to display the Powerline fonts, do not fret as I may have a solution. Check out the next section!
Caveats
I ran into a couple of issues when setting up this workflow and I will be explaining my solutions to those problems here.
If you ran into any issues and have resolved them, feel free to leave a detailed comment below and I will include it here to help others!
Path Environment Variable
When I initially set up the workflow, I found out that commands that previously worked did not function anymore. After shamefully struggling for a few hours, I discovered that my path variable was not set up correctly.
Run this command to see your path environments:
echo $PATHApparently, WSL did not pick up my Windows path environment variable.
I was able to solve this by installing the Windows 10 Creator Update (version 1703). You can try to update via “Settings” -> “Update & security”. If the update is not available there, you can also update manually (which was what I did).
Powerline Fonts
I also ran into an issue where the Powerline symbols were not displaying correctly for the Cobalt2 prompt layout.
I used the install shell script inside of the cloned fonts folder but to no avail. The symbols were showing up as squares on my system.
I was able to resolve this problem by installing the fonts manually (which was deceitfully simple).
- Navigate to the font you want to install.
- Right-click and select “Install”.
Closing Thoughts
I hope this guide helps you set up a more productive Windows terminal workflow! With their recent updates, Microsoft is definitely stepping up their shell game.
I think this is a step in the right direction that will help developers and designers (and anyone else interested in terminals!) tremendously.
Hopefully I saved you hours of research and headaches by aggregating all the information that helped me into one location. Let me know if you run into any problems and I will try my best to help out!
What are your thoughts about the recent Windows updates that included WSL, Bash on Ubuntu on Windows, and other features? Do you think more people will consider Windows as a more viable development environment now?
